Coffee cake with raspberry and coffee fudge filling, filled with fresh strawberries and raspberries and decorated with white chocolate ivy leaves.
Sounds complicated, no?
Well, it WAS!
... but so very worth it!
I was planning on taking "the making of ..." pictures for this, but I hadn't realised the battery in my camera was so low (completely dead), so my camera spent the baking time recharging.
Anyway, on with the show!
Coffee flavoured coffee cake
Ingredients
1/2 cup milk
1/3 cup instant coffee granules
2 cups SR flour
250 g butter
1 teaspoon vanilla extract
1 1/2 cups caster sugar
4 large eggs
Directions
Day 1
I started by creaming the butter, caster sugar and the vanilla together. I probably spent more time doing this than was needed, but I like creaming butter and sugar, I think it's my favourite part of baking. Yes I know, I'm wierd. :-P
Next, the eggs, one at a time, beating the mix all the while. It started looking curdled, but I know from experience that that is normal.
After that, I set the mixer on high for a few minutes and went to heat the milk and coffee. Stirring until the granuals were all gone ... and then I stuck it in the fridge and turned the oven on to preheat to 190C. I stopped the mixer and greased my tins, well, lined my springform cake tin with baking paper and greased my bundt pan with butter (I don't like using that cooking oil in a can, it tastes gross).
To be honest, I should have disolved the coffee in the milk first, but *shrug* cest la vie.
Once the milk mix had cooled, I started the beater once again and added a third of the flour, then half the mix, half the remaining flour, rest of the milk and, finally, the last of the flour. Then I beat it till it was smooth and creamy and coffee-e, poured it all into the cake tins and banged it all in the oven for 45 minutes.
After that, it was a simple matter of cooling the cakes, turning them out onto racks and then shoving them in the fridge for the night ... and taking the frozen raspberries out of the freezer to defrost.
Day 2
Time to put it all together! First though, I made a batch of coffee fudge. Then I smeared the mushy defrosted raspberries all over the base cake (not the bundt) and poured the fudge over the raspberries.
BTW, defrosted raspberries are not to be used for decoration. Ever. Not unless you WANT it to look like guts and gore, then feel free.
Anyway, the bundt cake went on top of the fudge, and then it went back in the fridge to set the fudge.
This is the only time that I will conceede that ivy is not a weed. I went outside to snip a couple of vines of the stuff, then came back inside to wash them and melt the white chocolate.
Dipping the leaves was fun, in a kind of monotonous way. I actually dipped more than I needed for decoration purposes, but this was the first time I'd ever done this, and wasn't sure how easy it would be to peel the chocolate off the leaves ... especially once they were frozen solid.
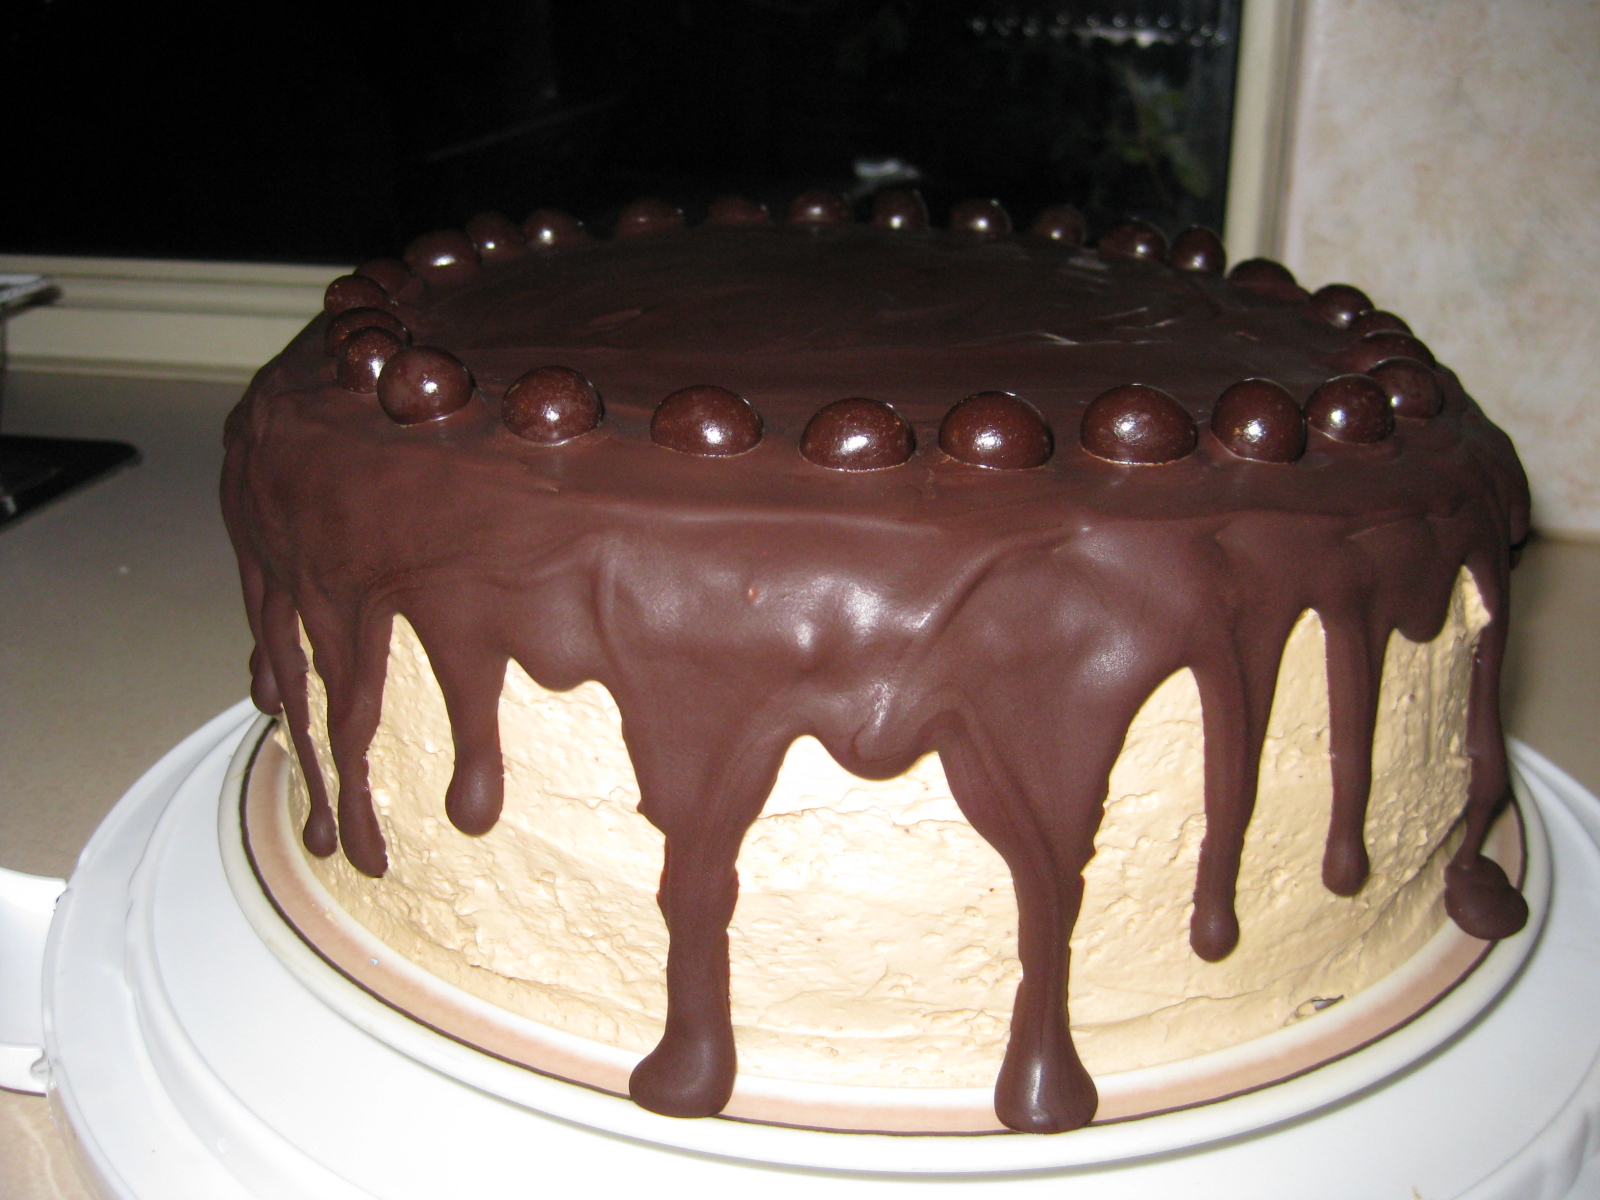
Day 3
Decoration!
I stuck the fruit on with melty white chocolate ... and managed to get it all over myself in the process.
Peeling the leaves was really fun. I had to do them one at a time though, else they would have melted all over the place (as I found out three leaves in) but the detail!
BLISS!
I stuck them on with white chocolate too.
I was really happy with the finished product. The rest of the family was awe struck ... right up until I told them that the cake was for looking at, not for eating ;)
Cooking with the Lemondragon
Coffee Fudge
Mmmmmmmmm fudge!
Mmmmmmmmmmmmmmmm coffee fudge!
This is the easiest fudge recipe I've ever come across. You don't need a sugar thermometer or anything! Which is great, because up until about a month ago, I didn't have one.
Coffee Chocolate Fudge
Ingredients
1 395 g can of sweetened condensed milk
1 1/2 tablespoons of instant coffee (or an espresso shot if you have a coffee machine)
1 teaspoon pure vanilla extract
450 g dark chocolate. I used 70% dark cooking chocolate blocks for this, but you can use whatever you have on hand.
3 tablespoons of butter, at room temperature (if using the espresso shot, I'd use a little less butter, but I haven't tried that out, as I don't have a coffee machine)
Directions
To start, you need a baking pan or tray ready to pour the fudge into once it's ready to be refrigerated. The thickness of the fudge dictates the size of the pan. The larger the pan, the thinner the fudge.
Once you've made up your mind, line the tray with baking paper, making sure there is enough hanging over the sides to use as handles when removing the fudge from the pan.
I started by melting the butter over a double boiler (a glass bowl on a saucepan of boiling water with a wooden kebab stick stuck between the saucepan and the bowl to stop it exploding) and stirring in the coffee until it was all dissolved.
Then I added the sweetened condensed milk and the vanilla and stirred that through until it was warm.
After that, I added the chocolate and stirred until it is all melted and fudgy looking.
You can tell it's ready when the mix comes cleanly off of whatever you're stirring it with. I use a spatula.
Once it has fudgified, you can pour it into the prepared tray and stick it in the fridge for at least four hours. I usually leave it for a full day before cutting it... Of course, you need to taste it before cutting it up, and that I usually do at 4 hours.
If, when you go to cut the fudge up, you find it sticks to the knife, you can heat the knife in a glass of boiling water before cutting... and periodically during the process.
I will add pictures tomorrow, when I can be bothered to dig out my camera.
Not so Ultimate No-bake Cheesecake
This was the dessert I made for my Grand-dad's birthday. It's what he asked for, else I'd have gone out and found a better recipe.
It was pegged, in the April 2012 issue of delicious. as the "ultimate no-bake cheesecake" ... while it looks good, it was NOT the ultimate no-bake cheesecake. In fact, it was kind of mooshie and flavourless.
This is not something that I'd ever make again, though, on the plus side, I did learn how to make chocolate curls.
No-bake Chocolate
Cheesecake
Ingredients
300 g
digestive biscuits
150 g
butter, melted
350 g
fresh ricotta
350 g
mascarpone, room temperature
50 g
icing sugar, sifted
1 tsp
vanilla extract
60 ml
coffee or chocolate liqueur
300 g
dark chocolate
Directions
1.
Crush
biscuits into fine crumbs. Add melted butter and mix until combined. Press into
the base and sides of a 23 x 3 cm loose bottomed tart pan. Chill for at least
30 mins. (in the fridge)
2.
Place
ricotta in a food processor and process until smooth. Place in a bowl and fold
in the mascarpone, icing sugar, vanilla and liqueur. Finely chop half of the
chocolate and fold through the mix. Spread the filling into the tart shell and
chill again for at least an hour.
Cheese slicer! |
3.
Melt
the remaining chocolate in a bowl set over a pan of simmering water (don’t let
the bowl touch the water). Stir until melted and smooth. Spread over a flat
tray and set aside at room temperature to harden.
4.
Using a
cheese slicer, draw long strokes across the top of the chocolate to make curls
and rough shards.
5.
Remove
the tart from the pan, place on a serving plate and decorate with the chocolate
curls and shards.
Lemon Coconut & Chocolate Caramel Slice
Today I cooked.... big surprise!
In the morning, I made
This recipe was from the CSR sugar website
In the morning, I made
Lemon Coconut Slice
Ingredients
150 g butter, chopped, room temperature
½ cup
caster sugar
1 ½ cups
plain flour
¼ cup
desiccated coconut
350 g
lemon curd
icing
sugar mixture to decorate (optional)
Directions
1.
Line base
and sides of a 19 cm x 30 cm lamington pan with baking paper extending up.
2.
Pre-heat
oven to 180 C
3.
Beat butter
and sugar in small bowl until pale and creamy. Add flour and coconut. Beat until
mixed to a crumbly consistency. Press over base of pan. Smooth top (a piece of baking
paper of the top and pressed down by hand will work)
4.
Bake in
oven for 20 to 25 minutes, or until golden brown. Remove and cool slightly.
Topping:
5.
Whisk eggs
and sugar in a medium bowl until pale and combined. Stir in coconut.
6.
Spread curd
evenly over the warm base. Pour topping over the curd. Spread evenly.
7.
Return to
the oven and cook for a further 25 minutes, or until golden. Remove and place on
a rack to cool in the pan. When cool, remove from the pan and slice into squares.
8.
Decorate
with a dusting of sifted icing sugar.
You can use jam instead of the lemon curd, but I really love lemon curd.
It would also be really nice with passion fruit butter.
Mum came around this weekend, mostly so that I could make chocolate caramel slice for her... Feel the love!
Chocolate Caramel Slice
Ingredients
Base:
1 cup
plain flour
½ cup
desiccated coconut
½ cup
brown sugar
125 g
melted butter
Filling:
60 g
butter
¼ cup
golden syrup
1 x 400
g can sweetened condensed milk
70 g
macadamia nuts, chopped
1 tbsp
golden syrup (extra)
Chocolate Topping:
300 g
dark chocolate chips
3 tsp
vegetable oil
Directions
1.
Preheat
oven to 180 C and line a 26 x 16 cm slice pan with baking paper.
2.
Combine
flour, coconut, brown sugar and melted butter until it comes away from the
sides of the bowl.
3.
Press
into the slice pan and smooth the top (again, and extra sheet of baking paper
of the top helps).
4.
Bake
for 12 – 15 minutes, or until golden brown.
5.
Heat
extra butter and golden syrup in a saucepan until the butter has melted and
simmer over a low heat for 3 minutes. Add condensed milk and stir, constantly,
over a medium heat for a further 7 – 10 minutes or until the caramel becomes
golden brown. (If it separates at this point, there is either too much butter
in the mix or you’ve cooked it too long. In both cases, you should start
again.)
6.
Spread
the caramel mix over the base and sprinkle with macadamia nuts. Drizzle the
extra golden syrup over the nuts.
7.
Melt
the chocolate in a double boiler and add the oil. Stir until smooth.
8.
Pour
the chocolate over the caramel and refrigerate until set before slicing. I had
it in the fridge for 3 hours, but I’d recommend a day in the fridge before
slicing.
I think mum got
into trouble for getting home so late, but she couldn’t leave with the slice
half set. That would have just been messy.
Coffee Chocolate Sponge Cake
This one was made for my Grand-ma and Aunt's birthday.
I acutally got the look of the cake from here, along with the recipe for the coffee buttercream frosting and the chocolate glaze, but I used the following recipe for the cake.
Ingredients
180g butter
3/4 cup (180g) caster sugar
3 small eggs, beaten and at room
temperature
1 Tbsp water mixed with 1 tsp
instant coffee granules
1 1/4 cups (150g) self-raising
flour, sifted
1/4 cup (30g) cocoa powder
Directions
1. Preheat the oven to 180
degrees C
2. Cream butter and sugar. Add in
eggs and coffee. Sieve in flour and cocoa. Combine well.
3. Divide batter into two 18cm
greased and floured cake tins. Bake for 20 to 25 minutes in the preheated oven.
4. Test with a skewer, and if
done, leave to cool 5 minutes in the tin before turning on to the rack.
It didn't rise so well, but it was my first attempt at a sponge, and I had no complaints about the flavour ... in fact, I should have made two of them.
Sacher Torte
Oh the joys of a three layer sacher torte!
It went down a treat, semi-solid chocolate shell covering a layer of rum and apricots.
Delicious!
This one turned out much darker than the first that I tried, I modified the recipe I found online.
It went down a treat, semi-solid chocolate shell covering a layer of rum and apricots.
Delicious!
This one turned out much darker than the first that I tried, I modified the recipe I found online.
Ingredients
240 g semi sweet chocolate (chopped)
1 cup
butter, softened
3/4 cup
icing sugar
12
eggs, separated
2 egg whites
4
tablespoons white sugar
1 1/2
cup plain flour
1/2 cup
corn flour
1/2 cup
cocoa powder
Filling:
1/3 cup
water
1/3 cup
white sugar
4
tablespoons dark rum, divided
1 370g jar apricot preserves
1
tablespoon water
Icing:
255 g
semisweet chocolate, chopped
85 g heavy cream
Directions
1.
Preheat
oven to 175 degrees C. Lightly butter 2 9-inch springform pans; place a circle
of parchment paper inside, and butter that as well.
2.
Melt 240
g of chocolate in a metal bowl placed over gently simmering water. Stir
frequently until melted, then remove from the heat and let cool slightly.
3.
Beat
the butter together with icing sugar until creamy. Mix in the melted chocolate,
then beat in the egg yolks, one at a time. In a clean bowl, beat egg whites
with white sugar until stiff and glossy. Fold into chocolate mixture, then fold
in flour and cocoa, until incorporated. Pour half of the mix into each of the 2 prepared springform pans, and
smooth the top.
4.
Bake in
the preheated oven until the edges begin to pull away from the sides of the
pan, and a toothpick inserted into the centre comes out dry, about 25 minutes in a fan force oven.
Cool pan on a wire rack for 15 minutes, then run a small knife around the edge
and remove the sides of the pan. Allow cake to cool completely on the base of
the pan. When cool, remove from pan, and remove parchment paper. Cut the rounded tops off both cakes
5.
Bring
1/3 cup water and sugar to a boil in a small saucepan. When the sugar has
dissolved and the syrup is clear, remove from heat and stir in 3 tablespoons
rum. Brush 1/3 of the syrup onto the cut side of the cake bottom.
6.
Puree
the apricot preserves with 1 tablespoon of water until smooth. Bring to a
simmer over medium heat in a small saucepan, and cook until thickened, about 2
minutes. Stir in remaining rum, then spread 1/3 of the jam mixture onto the cut
side of the cake bottom. Place the top of the cake onto the bottom. Brush the
outside of the cake with the remaining syrup, then spread remaining apricot
preserves over the top and sides; refrigerate until the icing is ready.
7.
To make
the icing, melt 255 g of chocolate over a double boiler or in the microwave
until smooth. Stir the cream to into
melted chocolate. Cool slightly, stirring often, until the chocolate reaches a
spreadable consistency.
8.
Set the
cake on a cooling rack set over a cookie sheet or waxed paper to catch any
drips. Pour the icing on top of the cake, and spread around the edges; allow
excess icing to drip through the rack. Cool cake to room temperature, then
carefully remove from the cooling rack using a spatula. Transfer to a dessert
plate and store in the refrigerator. Allow cake to come to room temperature
before serving.
Subscribe to:
Posts (Atom)